The Best Fluffy Pancakes recipe you will fall in love with. Full of tips and tricks to help you make the best pancakes.
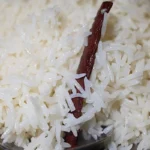
If your basmati rice keeps turning into a sticky clump, you are not alone and the fix is simpler than you think. Learning how to cook basmati rice without sticking does not require any special equipment.
It comes down to three things: removing surface starch before cooking, using the right amount of water, and letting the rice rest before you serve it. This guide walks you through every step, with the reason behind each one.
Why Basmati Rice Sticks in the First Place
Basmati grains are coated in surface starch left over from milling. When that starch hits hot water, it gelatinizes and acts like glue between grains. Too much water makes the problem worse: grains swell beyond capacity, rupture, and release even more internal starch into the cooking liquid.
The entire method below is built around eliminating both of these causes at every stage.
What You Need Before You Start
Choosing the Right Rice
Not all basmati is the same. Aged basmati rice stored for one to two years after harvest has a lower moisture content, which helps it stay firm during cooking and absorb water more evenly. Look for packaging that says “aged” or “extra long grain.”
Reputable brands from India and Pakistan generally perform better because of tighter quality control over grain length and starch content.
Equipment
A heavy-bottomed saucepan with a tight-fitting lid is essential thin pans create hot spots that burn the bottom layer while the top stays undercooked. You also need a fine-mesh strainer for rinsing and draining, and a fork for fluffing rather than a spoon, which crushes the grains.
Step-by-Step Method
Step 1 Rinse the Rice Thoroughly
Place the measured rice in a bowl. Cover with cold water, swirl it with your hand, and pour off the cloudy water. Repeat four to five times until the water runs almost clear. This strips away the excess surface starch responsible for stickiness. Do not skip this; it has more impact on the final texture than almost anything else in the process.
Step 2 Soak the Rice (Recommended, Not Mandatory)
After rinsing, cover the rice with fresh cold water and soak for 15 to 30 minutes. Soaking allows the grains to absorb some water before they hit the heat, which leads to more even grain elongation and reduces cooking time.
Do not soak for longer than 30 minutes over-soaked grains become brittle, break apart during cooking, and release more starch, making the final result stickier rather than fluffier.
Step 3 Drain and Briefly Air-Dry
Drain through a fine-mesh strainer and let the rice sit for 5 to 10 minutes. Soaking softens the grain structure slightly; this short drying period firms it back up so the grains hold their shape during cooking. Transfer to the pot only after most of the surface water has drained away.
Step 4 Use the Correct Water-to-Rice Ratio
The standard absorption method ratio for basmati is 1 cup rice to 1½ cups water. If the rice was not soaked, use up to 1¾ cups. Too much liquid is the single most common cause of mushy, sticky basmati when in doubt, use slightly less and check near the end of cooking.
| Rice | Water No Soak | Water 15–30 min Soak |
| 1 cup | 1¾ cups | 1½ cups |
| 2 cups | 3½ cups | 3 cups |
| 3 cups | 5¼ cups | 4½ cups |
Step 5 Toast in Ghee or Oil (Optional but Effective)
Before adding water, heat a tablespoon of ghee, butter, or neutral oil over medium heat. Add the drained rice and stir for 60 seconds until the grains smell slightly nutty and look translucent at the edges.
This toasting step coats each grain in a thin layer of fat, a physical barrier that prevents grains from sticking to each other and to the bottom of the pot.
Step 6 Add Water, Salt, and Optional Aromatics
Pour in the measured water or low-sodium broth along with salt. A half teaspoon of lemon juice per cup of rice is a useful addition here; the mild acidity keeps grains separate and prevents the cooked rice from turning yellowish as it cools.
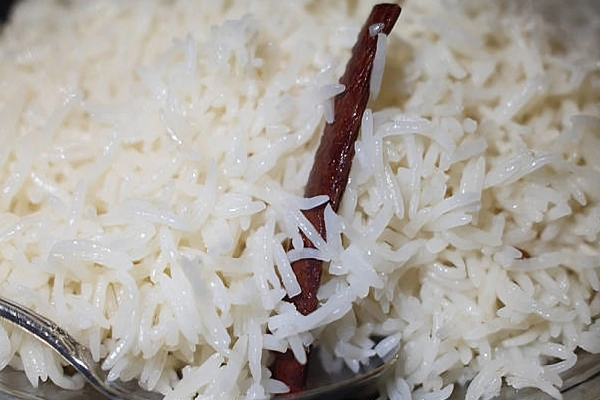
Optional aromatics that pair naturally with basmati: a bay leaf, two or three cardamom pods, a short piece of cinnamon stick, or a few whole cloves. These add fragrance without overpowering the rice’s natural nuttiness. Stir once gently to make sure no grains are stuck to the bottom, then leave it alone.
Step 7 Reduce heat to low and simmer
Place the pot on medium-high heat with the lid off until the water reaches a full rolling boil. This ensures even heat distribution before the lid goes on.
Once boiling, cover tightly and immediately drop the heat to the lowest setting on your stove. From this point the rice cooks by steam the absorption cooking method not by aggressive boiling.
Step 8 Cook 10 to 12 Minutes, Lid Stays On
Basmati needs only 10 to 12 minutes of covered low-heat cooking. The steam trapped inside is what cooks the upper layers. Lifting the lid even once releases that steam, leaving the top layer dry and undercooked while the bottom overcooks. Set a timer. Do not open it.
Step 9 Rest Off the Heat for 5 Minutes
Turn off the heat but keep the lid firmly on. Give the rice five minutes without stirring. During this time residual steam finishes cooking the grains evenly and excess moisture is fully reabsorbed.
Rice taken straight off the heat skips this redistribution; it comes out wet and clumped. The 5-minute rest is what separates average basmati from properly cooked basmati.
Step 10 Fluff with a Fork and Serve
Use a fork with light upward lifting strokes, working from the edges inward. Avoid pressing down or stirring in circles that compresses the grains and reintroduces stickiness right at the finish line. For serving, scoop from underneath with a wide spatula and let the rice fall loosely back into the bowl.
Common Mistakes That Cause Sticking
Most sticking problems trace back to one of these four errors — all of which happen before cooking starts or right at the end:
| Mistake | What Happens | Fix |
| Soaking too long (over 30 min) | Grains go brittle, break during cooking, release starch | Keep soak time to 15–30 minutes only |
| Too much water | Grains rupture and release internal starch | Use 1½ cups per cup of soaked rice; 1¾ if unsoaked |
| Using a small or thin pot | Hot spots burn the bottom; top layer stays undercooked | Use a heavy-bottomed pot matched to the quantity |
| Serving immediately off the heat | Rice still wet; grains compress and clump together | Rest covered for 5 minutes before opening the lid |
The Pasta Method: An Alternative for Larger Quantities
For three or more cups of rice, some cooks prefer the large-water method. Bring a large pot of salted water to a full boil at least five times the volume of the rice.
Add the rinsed rice and cook uncovered for 5 to 6 minutes, then drain immediately through a strainer. Return the rice to the pot with two tablespoons of water, cover tightly, and steam on low heat for another 5 to 7 minutes.
This method removes a much larger proportion of dissolved starch through draining, which is why the final texture is often extremely clean and separated. It is less precise for small quantities but reliable for larger batches and for cooks using thin-bottomed pots.
Storing and Reheating Without Losing Texture
Transfer leftovers to an airtight container while still slightly warm and refrigerate for up to three to four days. Do not keep cooked rice out at room temperature for more than two hours. This is a food safety issue, not just a quality concern.
To reheat, sprinkle a tablespoon of water over the rice, cover loosely, and microwave on high for 90 seconds to 2 minutes. The water re-steams the grains without making them wet.
For freezing, portion into zip-lock bags, flatten to save space, and freeze for up to three months. No thawing required. Cook from frozen.
Three Things That Make a Noticeable Difference
Use a non-stick or enameled pot
if your stove runs hot it eliminates scorching at the bottom before the top layer finishes, which is a common problem on gas stoves with uneven burners.
Match pot size to quantity
One cup of rice in a large stockpot spreads the grains too thin and water evaporates too fast. A medium saucepan handles up to two cups well; use a larger pot only for three cups or more.
Season the cooking water
Half a teaspoon of salt per cup of rice seasons the grain from the inside during water absorption, not just on the surface. The flavor difference is noticeable.
Avoid adding oil to the cooking water
A common myth suggests this prevents sticking, but oil coats the grains and blocks proper moisture absorption, leading to unevenly cooked rice. Use oil only in the toasting step before the water goes in.
Quick Reference
Rinse 4–5 times until water is clear
Soak 15–30 minutes in cold water
Drain and air-dry 5–10 minutes
Toast in ghee or oil for 60 seconds (optional)
Add 1½ cups water per cup of soaked rice + salt + lemon juice
Bring to a boil without a lid, then cover and turn down the heat
Cook 10–12 minutes lid stays on
Rest covered, off the heat, for 5 minutes
Fluff with a fork and serve
Cooking basmati rice well is a repeatable skill, not luck. Follow this method consistently and the result will be light, fluffy, perfectly separated basmati every time whether served alongside a dal, a rich curry, or as the base for a layered biryani.

James Carter is a food researcher and writer passionate about global cuisines, street food, and the stories behind what we eat. He combines thorough research with a genuine love for food culture to bring readers accurate, well-written, and interesting content.