The Best Fluffy Pancakes recipe you will fall in love with. Full of tips and tricks to help you make the best pancakes.

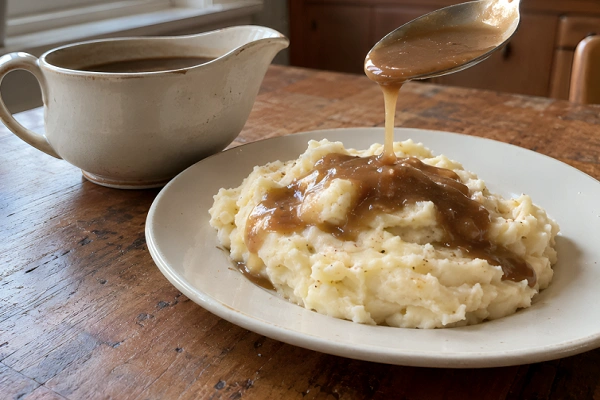
No drippings saved, and you still need gravy right now. Maybe the turkey got deep-fried, maybe you just forgot, maybe there’s no roast in sight and you’re simply craving gravy over mashed potatoes.
That’s exactly what this is: how to make gravy without drippings, using nothing but butter, flour, and stock.
Why Gravy Works Without Drippings
Drippings do two things: they add fat, and they add concentrated, browned meat flavor from the fond stuck to the roasting pan. You can reproduce both without ever touching a roasting pan.
- Fat comes from butter, oil, or the skimmed fat off a stock, and it’s what carries flavor and cooks the flour into a roux.
- Browned flavor comes from sautéing onion, garlic, celery, or mushrooms in the fat before you add flour. This step matters more than any other ingredient swap, since it’s what stops the gravy from tasting flat.
- Body and savoriness come from a good stock or broth, reduced and seasoned properly.
Leaving out the aromatic-browning step is the one shortcut that actually costs you flavor, the gravy ends up tasting mostly of flour and salt.
Spend the extra five minutes on it, and the gravy tastes like it simmered with a roast for hours, even though it took ten minutes.
Ingredients
This makes about 2 cups of gravy, enough for 4 people at a generous ½ cup serving each, or up to 6 people with smaller portions. Scale the recipe up if you’re cooking for a bigger table.
- 4 tablespoons unsalted butter (or vegetable oil for a dairy-free version)
- 1 small onion, coarsely chopped (optional but preferable)
- 1 garlic clove, minced (optional)
- 4 tablespoons all-purpose flour, or 2 tablespoons cornstarch for a gluten-free version
- 2 cups stock or broth, matched to what you’re serving (chicken, beef, turkey, or vegetable)
- Salt and black pepper to taste
- Optional: ½ teaspoon Worcestershire sauce or soy sauce for umami depth
- Optional: ½ teaspoon bouillon paste if your stock tastes weak (use sparingly, it’s salty)
- Optional: a splash of milk or cream for a richer finish
Step-by-Step Method
1. Build the Flavor Base
Butter should be melted in a saucepan at a heat setting. If you’re including onion and garlic, add them now and cook for 4 to 5 minutes, until the onion turns soft and translucent.
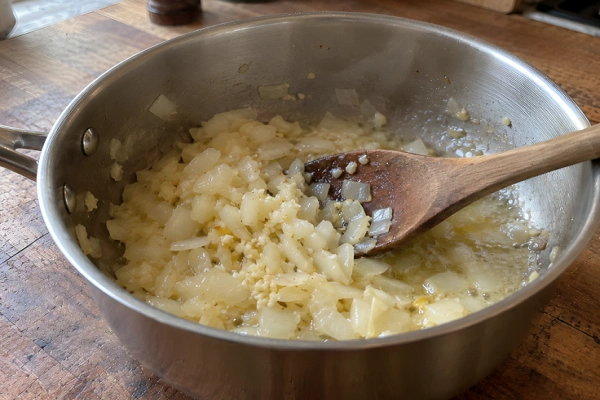
If you have a few extra minutes, letting it go closer to 8 to 10 minutes will turn the onion lightly golden and add even more depth, though 4 to 5 minutes is enough to build real flavor if you’re short on time.
If you’re using oil instead of butter, heat it until it shimmers but doesn’t smoke.
2. Make the Roux
Sprinkle the flour over the butter (and onions, if using) and whisk continuously. Cook for 1 to 2 minutes.
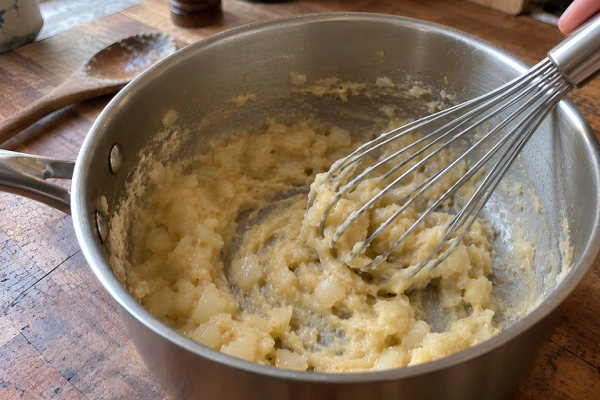
This cooks out the raw, starchy taste and gives the gravy a light, nutty background note.
Making it gluten-free instead? Skip this step and mix the cornstarch with 2 tablespoons of cold water to form a slurry you’ll whisk that into the stock once it’s simmering.
3. Add the Stock Gradually
Pour in the stock slowly, about half a cup at a time, whisking after each addition before adding more. This slow process is what keeps lumps away.
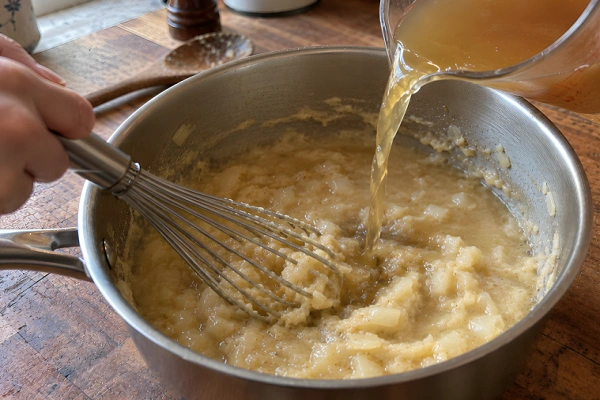
For the cornstarch version, bring the stock to a simmer first, then whisk the slurry in.
4. Simmer Until Thickened
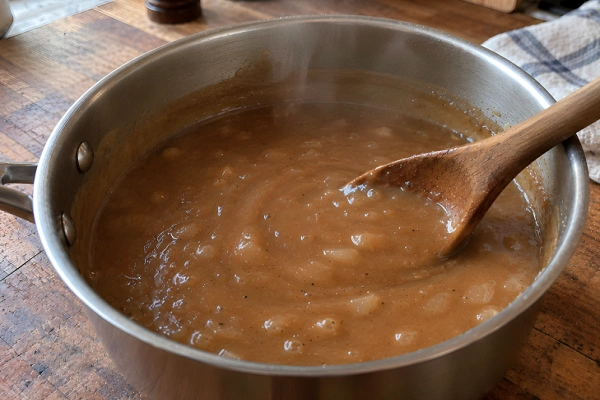
Lower the heat and let the gravy simmer for 5 to 8 minutes, stirring occasionally. It will thicken further the longer it sits, so don’t judge the final texture too soon.
5. Season and Adjust
Taste before adding salt, since stock already carries sodium. If the gravy tastes like it’s missing that “meaty” depth, a splash of Worcestershire or soy sauce usually fixes it.
6. Optional Finishing Touch
Stir in a tablespoon of milk or cream at the end for a smoother, richer finish. This works especially well when the gravy is going over mashed potatoes or biscuits rather than sliced meat.
When You’ll Actually Need This Recipe
- Deep-fried turkey: There’s no roasting pan involved, so there are no drippings at all. This is the single most common reason people search for a dripping-free gravy.
- Smoked or brined turkey: Drippings are often available here, but brining or smoking can push the salt level high enough that the drippings taste too salty on their own. In that case, it’s usually easier to build gravy from scratch than to dilute over-salted drippings.
- Air-fried turkey breast or chicken: Small cuts cooked this way don’t produce enough pan liquid to bother collecting.
- Rotisserie chicken or store-bought meat: If you didn’t roast it yourself, you don’t have drippings to work with, but you can still have fresh gravy.
- Make-ahead holiday prep: Since this recipe doesn’t depend on a finished roast, you can make it a day or two in advance and reheat it, which frees up stovetop space on the day of a big dinner.
Fixing Gravy That Isn’t Right
- Too thin: Let it simmer a few more minutes uncovered, since gravy thickens as liquid evaporates. If it’s still thin, whisk in an extra thickening boost: 1 tablespoon cornstarch mixed with 2 tablespoons cold water (this is separate from, and in addition to, the 2 tablespoons of cornstarch used in the base recipe).
- Too thick: Whisk in a little extra stock or water, a tablespoon at a time, until it loosens. Avoid adding more stock than needed, since gravy also keeps thickening after it’s off the heat.
- Lumpy: This almost always comes from adding liquid too fast or not whisking constantly. If it’s already lumpy, run it through a fine mesh strainer or blitz it briefly with an immersion blender.
- Tastes like it’s missing that “meaty” quality: A pinch of bouillon paste can add that depth back, but it’s concentrated, so start with a very small amount and taste before adding more.
Variations
- Vegetarian or vegan gravy: Use vegetable stock, oil instead of butter, and soy sauce for umami depth.
- Gluten-free gravy: Replace the flour with a cornstarch slurry, added directly to the simmering stock.
- Mushroom gravy: Sauté finely chopped mushrooms along with the onion before adding the flour, for extra texture and an earthier flavor.
- Herb gravy: Add fresh thyme or a bay leaf while simmering, then remove it before serving.
- Gravy with a splash of wine: Deglaze the pan with a tablespoon or two of white wine or cognac right after cooking the onions, letting it reduce for a minute before adding the flour. This adds a layer of flavor close to what you’d get from a roast.
FAQs
Is gravy without drippings as good as the real thing?
It won’t taste identical, since drippings carry a unique flavor from whatever meat was roasted. But once you’ve browned onions or garlic in the fat and added a good stock, most people can’t tell the difference once it’s poured over mashed potatoes or turkey.
Can I make this ahead of Thanksgiving?
Yes, and that’s one of the main reasons this recipe is useful. Make it up to two days ahead, store it in the fridge, and reheat it gently on the stove, thinning with a splash of stock if needed.
What stock works best?
Match the stock to what you’re serving: chicken or turkey stock for poultry dinners, beef stock for beef dishes, and vegetable stock for a fully vegetarian meal.
Can I use bouillon instead of stock?
It works fine dissolved in water, just go lighter on any added salt afterward since bouillon is already concentrated.

Rachel Bradley is a food writer and recipe developer with a love for home cooking and global flavors. She has spent years testing recipes in her kitchen, exploring everything from quick weeknight meals to traditional dishes from around the world. Her goal is simple — make great food accessible to everyone.