The Best Fluffy Pancakes recipe you will fall in love with. Full of tips and tricks to help you make the best pancakes.

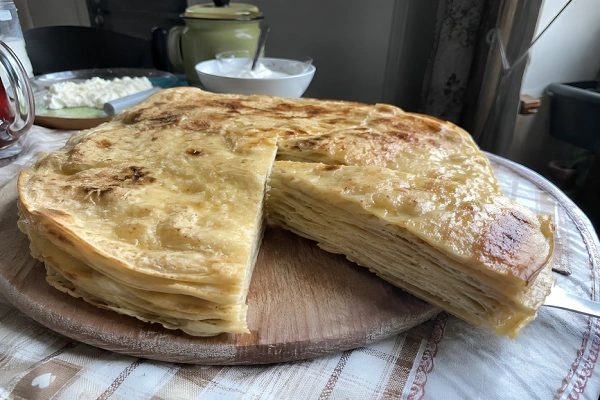
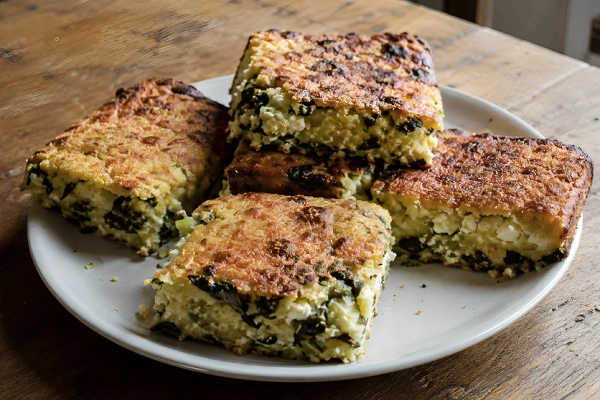
If you are searching for a Traditional Flija Recipe Step by Step, you are in the right place. Flija is not just food, it is a living tradition that Albanian and Kosovan families have protected for centuries. It takes real fire, unhurried attention, and ingredients you do not compromise on. Once you taste it, you understand immediately why people still make it the old way.
I first had flija at a family gathering in the mountains. An older woman sat by an open fire, pouring batter one thin coat at a time, covering each with a domed iron lid called a saj, then placing glowing coals on top. Nobody rushed her. Nobody needed to. That afternoon the fire, the smell, the slow building of something beautiful stayed with me long after the last bite.
Equipment You Need
| Equipment | What It Does | Modern Alternative |
| Saj (iron dome lid) | Sits over pan hot coals placed on top | Oven broiler |
| Fat iron tava (pan) | Base where each layer cooks | Cast iron skillet |
| Open fire or charcoal | Heat from below | Gas stovetop burner |
| Ladle | Pours thin, even coats of batter | Same |
| Pastry brush | Spreads cream between layers | Back of a spoon |
No saj at home? Use a cast-iron skillet under a preheated broiler. There is more back and forth movement, but the results are great.
Ingredients (Serves 8)
| Detail | Info |
| Prep Time | 20 minutes |
| Cook Time | 2 to 3 hours |
| Total Time | Approximately 2.5 to 3.5 hours |
| Servings | 8 people |
| Difficulty | Moderate |
- 500g (4 cups) all-purpose flour
- 600ml (2½ cups) cold water
- 2 large eggs
- 1 teaspoon salt
- 200g kaymak or full-fat sour cream
- 80–100g unsalted butter, melted
- Small amount of butter or oil for greasing
Note on eggs: Eggs are used in many traditional family recipes across Kosovo and Albania and are a widely accepted ingredient that adds richness to the batter. The most basic version uses only flour, water, and salt but adding eggs is not a modern shortcut. Both versions are authentic. Use whichever your family prefers.
About Kaymak: Kaymak is a thick, clotted cream native to the Balkans and Middle East. Look for it at Turkish or Middle Eastern grocery stores. If unavailable, mix full-fat sour cream with a spoonful of clotted cream as the closest substitute.
Step-by-Step Instructions
Step 1 Make the Batter
Add flour and salt to a large bowl and whisk briefly. Crack both eggs directly into the flour, pour in half the water, and start mixing. Add the remaining water gradually while whisking to keep the batter smooth and lump-free.
The consistency you want is thinner than pancake batter closer to French crepe batter. It should pour freely from a ladle and coat the back of a spoon lightly. Too thick? Add some more water.
Let the batter rest 10 to 15 minutes at room temperature before you begin. This short wait allows the flour to fully hydrate and gives you smoother results when you start pouring.
Step 2 Prepare Your Heat Source
Light your charcoal or wood fire and wait until it builds a solid bed of glowing coals, not active flames. Aggressive flame burns the outside of each layer before the inside has a chance to set.
Place your pan over the heat and grease it lightly with butter or oil. It should be properly hot, not smoking before the first pour. At the same time, set your saj over the coals to preheat. A cold saj leaves your layers pale and undercooked on the surface.
Step 3 Build the Layers
Pour the first coat
Spread a thin layer of batter evenly all over the surface of the pan. Tilt gently to reach the edges. Target about 2 to 3mm thickness. Think crepe, not pancake if it looks thick, use less next time.
Cover with the saj immediately
Top heat and bottom heat work together here; one sets the surface while the other cooks the base. Using a broiler instead? Slide the pan under it now.
Wait until fully set
After 4 to 6 minutes, lift the saj and check. No wet or shiny patches anywhere, just pale gold with small bubbles scattered across the surface.
Spread cream and butter
Apply a thin, even layer of kaymak across the cooked surface, then drizzle melted butter over it. Do not apply too little; the flavor of this dish lives between the layers, not in the batter itself.
Pour the next coat
Add another ladle of batter over the cream, spread it evenly, replace the saj, and wait again. This rhythm pour, cover, wait, cream, butter, pour continues until all your batter is finished.
A typical batch produces 15 to 20 layers depending on pan size and how thinly you pour.
Final layer: Leave the last coat without cream on top. Cook it a minute or two longer so the surface turns a deeper golden-brown. This becomes the crust of your flija.
Most common beginner mistake: Pouring the next coat before the previous one has fully set. Wet batter over partially cooked batter all runs together and breaks down the structure. When in doubt, wait one more minute.
Step 4 Rest, Slice, and Serve
Remove the pan from heat once the final layer is done. Let the flija sit undisturbed for at least 10 minutes. The layers firm up during this rest and clean slicing becomes possible.
Cut into wedges as if a cake or into squares. Serve warm.
What to Serve Alongside Flija
Kos (Albanian plain yogurt) — its mild tang balances the butter and cream beautifully
Mountain honey — wildflower or pine honey works especially well
Pickled vegetables — a sharp, refreshing contrast after rich bites
Strong black coffee or Albanian mountain tea — the classic pairing
For a sweeter finish, a light dusting of powdered sugar or a warm honey drizzle over the top also works well.
Four Tips That Make a Real Difference
1. Full-fat ingredients only
Margarine and low-fat substitutes do not work here. Real butter and kaymak are structural; they bind each layer to the next and create the flavor that makes flija worth the effort.
2. Pour thinner than feels right
Most first-timers ladle too much batter per coat. Each pour should barely cover the surface almost translucent before it sets. Aim for the quantity of layers over the thickness of each one.
3. Grease the pan once only
A light greasing before the very first pour is all you need. Over-greasing creates a slippery base that makes the bottom layer slide instead of sitting flat and cooking properly.
4. Keep the heat steady from start to end
A sudden spike burns the outside while leaving the center raw. A sudden drop produces pale, undercooked layers. Find your heat level in Step 2 and hold it there until the very last pour.
Storage
Flija keeps at room temperature for one day. Refrigerate leftovers wrapped tightly for up to three days. Reheat individual slices in a dry pan over low heat or in a microwave for 30 seconds.
Freezing: Wrap individual slices in plastic wrap, place in a freezer bag, and freeze for up to one month for best quality. Beyond that, the high dairy content of kaymak and butter begins to affect the texture noticeably after thawing. Gently reheat. Let thaw overnight at room temperature.
Many cooks find that flija tastes even better the day after it is made. The layers settle overnight, the cream absorbs evenly, and every bite becomes more cohesive. When it comes to making extra, it is often a good idea to do so.
Regional Variations
Kosovan Flija (Flia e Kosovës) — The most widely known version. Plain flour-and-water batter with kaymak between every layer. Families in the Dukagjini region often use more eggs to make the food taste better.
Albanian Highland Flija (Flia Malësorëve) — From the Albanian Alps. Cornmeal replaces a portion of the flour, giving each layer a slightly grainy texture and a nuttier, earthier taste.
Sweetened Celebration Flija — Prepared for weddings and Eid. Sugar is added to the batter and between some layers, kaymak is substituted with sweetened condensed milk, making it a genuine dessert.
Cheese-Filled Flija — Crumbled djathë i bardhë (Albanian white cheese) replaces or supplements the kaymak. The result is saltier and tangier; many Albanian cooks find it pairs particularly well with strong coffee.
Why the Slowness Is the Point
People regularly ask whether flija can be made faster. The honest answer is no, not without losing what makes it worth eating.
Every single pour creates a thin caramelized edge where fresh batter meets the cooked layer beneath it. Multiply that across 15 to 20 layers and you build a depth of flavor that no shortcut produces. This is also why a standard oven bake all the batter poured in at once never works. Those edges never form, the layers merge into each other, and the texture goes flat.
But time is not just about flavor. Making flija has always been a communal act. People gather around the fire, conversation moves through the afternoon, and the layers quietly accumulate. The two hours are not a cost you pay to eat well, they are the experience itself.
Nutritional Information (Approximate, Per Serving)
These are rough estimates only. Actual values vary significantly depending on how much kaymak and butter you apply per layer. Do not treat these as precise figures.
| Nutrient | Per Serving (1/8 of recipe) |
| Calories | ~420 to 500 kcal |
| Carbohydrates | ~36 to 40g |
| Protein | ~7 to 9g |
| Total Fat | ~18 to 24g |
| Saturated Fat | ~10 to 14g |
| Sodium | ~200 to 220mg |
Final Thoughts
The Traditional Flija Recipe Step by Step presented here follows the original method without cutting corners. Thin batter, real fat, consistent heat, one careful pour at a time — that is genuinely everything you need.
Set aside a full afternoon the first time you make it. Put on music. Invite someone over. When you cut into that stack of golden, cream-soaked layers and take your first bite, you won’t need any more justification.
FAQs
Which type of oven is required to prepare flija?
Some cooks have tried it. It produces something edible but not flija the caramelized edges between layers never form and the result tastes noticeably flat. The stovetop-plus-saj method is not optional if you want the real thing.
Is flija the same as börek or baklava?
Not at all. Börek is a savory pastry made with thin phyllo sheets and a filling. Baklava is a sweet dessert built from phyllo, nuts, and sugar syrup. Flija uses a liquid crepe batter, has no pastry sheets, and contains no filling. Three entirely different dishes from overlapping culinary regions.
Can I freeze flija?
Yes wrap individual slices in plastic wrap, place in a freezer bag, and freeze for up to one month for best quality. Thaw overnight at room temperature and reheat gently in a pan.
How many layers should proper flija have?
Fifteen is the practical minimum. Twenty or more is ideal. The exact number depends on your pan size and how thinly you pour the quantity of thin layers always beats a smaller number of thick ones.
Is flija gluten-free?
The traditional recipe requires wheat flour, so no. A few home cooks have experimented with gluten-free flour blends with moderate success, though layer adhesion suffers and the texture differs noticeably.
What is the difference between flija and pite?
Pite is an Albanian savory pie phyllo dough, baked in a standard oven, with a filling inside. Flija uses liquid batter, has no filling, and is cooked over open fire. Different ingredients, different technique, entirely different dishes.
When is Flia Day celebrated?
Every year on March 17, families across Kosovo and Albania celebrate Flia Day as part of the traditional Verëza spring festival. It is a day dedicated entirely to gathering, preparing, and eating flija together.

Rachel Bradley is a food writer and recipe developer with a love for home cooking and global flavors. She has spent years testing recipes in her kitchen, exploring everything from quick weeknight meals to traditional dishes from around the world. Her goal is simple — make great food accessible to everyone.