The Best Fluffy Pancakes recipe you will fall in love with. Full of tips and tricks to help you make the best pancakes.

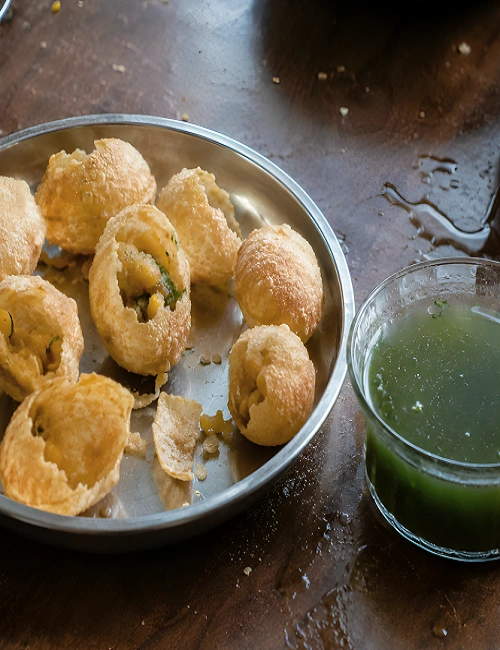
Craving that first crunchy bite followed by a burst of tangy, spicy water? You don’t need a street stall for that. This guide shows you exactly how to make pani puri at home, using simple ingredients and steps that actually work.
Whether you’re making it for a family gathering or just treating yourself, here’s everything you need, from crispy puris to the perfect pani.
What Is Pani Puri?
Pani puri is that irresistible combo of a crispy hollow shell, spicy-tangy mint water, and a soft potato filling, all in one bite. Depending on where you’re from, you might call it golgappa, puchka, or gupchup. The name changes by region, but the addictive flavor stays the same.
Ingredients You’ll Need
For the Puri (Crispy Shells)
- 1 cup semolina (sooji/rava), fine variety
- 2 tablespoons all-purpose flour (maida) helps the puris puff up and stay crisp
- A pinch of baking soda (optional, for extra crispness)
- Water, as needed, to knead a stiff dough
- Oil, for deep frying
For the Pani (Flavored Water)
- 1 cup fresh mint leaves
- 1/2 cup fresh coriander leaves
- 2–3 green chilies (adjust to taste)
- 1-inch piece of ginger
- 2 tablespoons tamarind pulp
- 1 teaspoon roasted cumin powder
- 1/2 teaspoon black salt (kala namak)
- 1/2 teaspoon regular salt
- 1/2 teaspoon chaat masala
- A pinch of black pepper
- 4–5 cups chilled water
- Ice cubes, for serving
The Filling
- Boil, peel, and coarsely mash two medium potatoes
- 1/2 cup boiled white chickpeas (optional)
- 1 small onion, finely chopped (optional)
- Sweet tamarind-date chutney, to taste
- A sprinkle of roasted cumin powder and chaat masala
How to Make Pani Puri (Step-by-Step)
Step 1: Prepare the Puri Dough
Mix the semolina, all-purpose flour, and baking soda in a large bowl. Add water gradually and knead until you get a stiff, smooth dough it should not be soft, or the puris won’t turn out crisp.
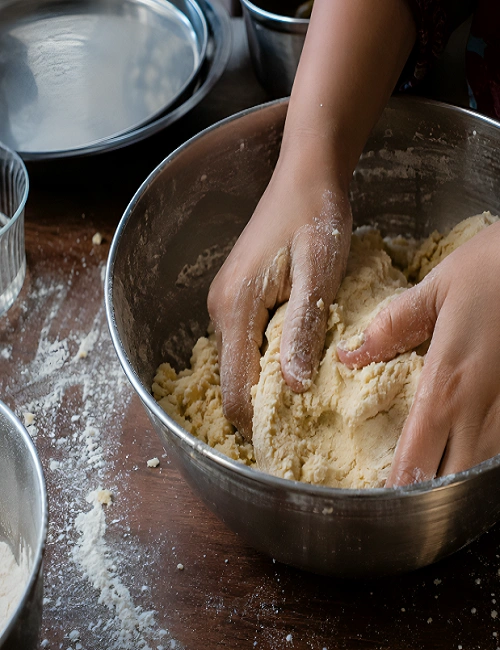
Place a moist cloth over the dough and let it rest for 20 to 30 minutes. This resting period allows the semolina to absorb moisture evenly, which helps the puris puff up properly when fried.
Step 2: Roll and Cut the Puris
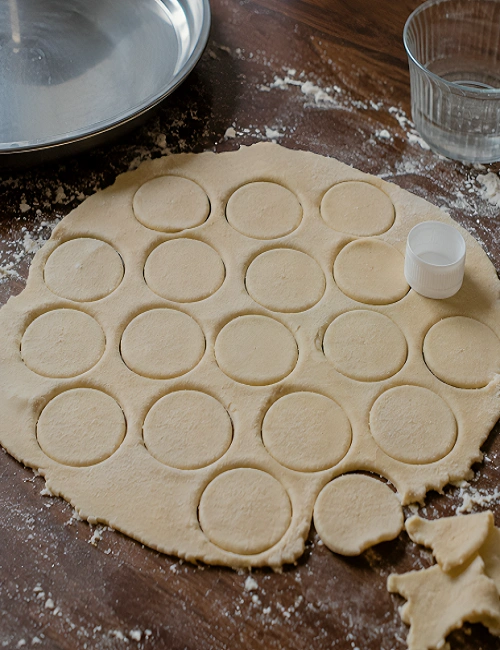
Divide the dough into small portions and roll each portion into a thin sheet, about 2 to 3 millimeters thick. Roll it as evenly as possible, since uneven thickness stops some puris from puffing up. Use a small round cutter or a bottle cap to cut out small circles, roughly 2 inches in diameter.
Step 3: Fry the Puris
Heat oil in a deep pan until it’s hot at medium-high. Test the oil by dropping in a small piece of dough; it should rise to the surface within a few seconds.
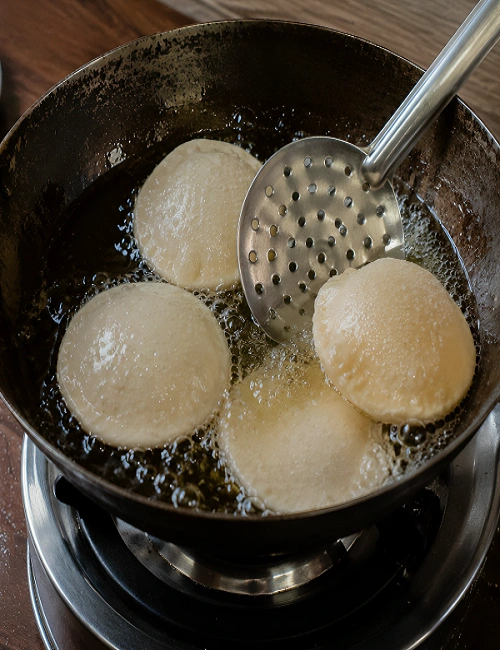
Slide in a few puris at a time, and gently press them with a slotted spoon as they fry. This gentle pressing helps them puff up into hollow balls.
Fry until they turn light golden and crisp, then drain them on paper towels. Let the puris cool completely and store them in an airtight container until you’re ready to serve.
Step 4: Make the Pani
Add the mint leaves, coriander leaves, green chilies, and ginger to a blender along with a little water, and blend into a smooth paste. Mix this paste with the tamarind pulp, roasted cumin powder, black salt, regular salt, chaat masala, and black pepper in a large jug.
Stir in the chilled water and taste the mixture, adjusting the salt, spice, or tanginess to your preference. Refrigerate the pani for at least 30 minutes so the flavors blend together, and add ice cubes just before serving to keep it refreshingly cold.
Step 5: Prepare the Filling
Mix the mashed potatoes with the boiled chickpeas and diced onion, if using. Add a little chaat masala and roasted cumin powder to season the mixture lightly, since the pani itself is already well-spiced.
Step 6: Assemble and Serve
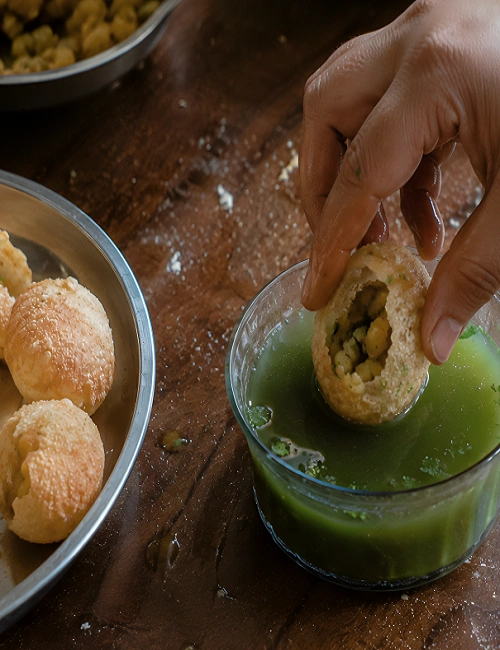
Gently tap a small hole in the top of each puri using your thumb or a spoon.
Fill it with a spoonful of the potato-chickpea mixture, add a little sweet tamarind chutney, and then dip or fill it with the spiced pani. Serve immediately, since puris turn soft quickly once filled with water.
Tips for the Best Homemade Pani Puri
Keep the dough stiff
A soft dough leads to puris that don’t puff up or turn crisp.
Roll evenly
Uneven thickness is the most common reason puris fail to hollow out properly.
Fry on medium-high heat
Oil that’s too hot browns the puris before they puff; oil that’s too cool makes them absorb excess oil and turn chewy instead of crisp.
Chill the pani well
Cold pani tastes noticeably better and is closer to how it’s traditionally served.
Store puris properly
Once completely cooled, keep them in an airtight container; they can stay crisp for one to two weeks if kept away from moisture.
Serve immediately after filling
Pani puri is meant to be eaten right away, as the puris lose their crunch quickly once they touch the water.
What Can Go Wrong (and How to Fix It)
A few small slip-ups can throw off your results even when the dough and frying go right. Pouring in too much water at once dilutes the pani’s flavor, so add it gradually and taste as you go.
Skipping the pani’s resting time is another common shortcut: give it at least 30 minutes so the flavors actually blend, or it’ll taste flat.
Overstuffing the filling can crack the puri before you even take a bite, so a modest spoonful is enough. And check that your semolina is fresh; stale semolina won’t crisp up properly no matter how well you fry it.
FAQs
Is it possible to prepare pani puri without deep-frying?
Yes, baked versions exist, though they don’t achieve the same hollow, crisp texture as the traditional deep-fried method. If you prefer a lighter option, you can experiment with an air fryer, keeping in mind the texture will differ from the classic version.
How long do homemade puris stay fresh?
When stored in a completely airtight container away from humidity, homemade puris can stay crisp for one to two weeks.
Can I make the pani a day in advance?
Yes, the pani actually tastes better after resting for several hours or overnight in the refrigerator, since the flavors have more time to blend. Just stir it well and add new ice right before you serve it.
Is pani puri the same as golgappa?
Yes, these are regional names for the same snack. The recipe and preparation method are essentially identical, with only the name differing by region.

Rachel Bradley is a food writer and recipe developer with a love for home cooking and global flavors. She has spent years testing recipes in her kitchen, exploring everything from quick weeknight meals to traditional dishes from around the world. Her goal is simple — make great food accessible to everyone.